 |
I wanted a way to make camping in the 4Runner more comfortable. The only problem is the rear area of the 4Runner is a little bit short (about 5'10", which I assure you is NOT enough for a 5'10" person!), not really wide enough between the wheel wells for two people to sleep comfortably, and doesn't leave any place for your camping gear aside from under the truck or piled in the front seats.
Well, step one was to get a little more length. The only way to do that was to pull out the seat bottoms from the back seat. This gives a nice 6' 4" or so. This is pretty comfortable, except for the fact that you need to fill in the gap to have somewhere to rest your head. No big deal. Unfortunately, you are still left with a space that is a) too narrow, b) has some uncomfortable bends (the seat backs don't really lie flat), and c) doesn't leave you any place to stash your stuff while you sleep.
Well, it certainly seemed that I could get more width and more storage if I could just get above the wheel wells. So I needed to build a deck of some sort.
|
My design objectives were:
So I got out ye olde measuring tape, and found out that the back section very neatly comes in at 4' wide, and 3' deep, and needed to be raised up about 10" to get over the wheel wells and still be low enough to lie down on comfortably. I then pulled out the seat bottoms and checked the front area. And lo and behold, that area was also 4' by 3'.
So step one. Go to lumber yard, get 4' by 8' sheet of 5/8" plywood. (See "what I'd do different" at the end of this article.) Have the yard cut it into 2 4x3 sections, and 2 2x2 sections (not used, but convenient). Cool. No tools required yet! While at the hardware store, browse around for something to use as legs. They had to be removable, yet strong, light, cheap, etc. Hmm, hmmm. Plumbing aisle! Eureka!
I decided on 1/2" steel pipe as my legs. I used the round flange pieces for the feet, and also to attach to the pieces of wood. Ok, here's where things went a little south. The legs needed to be various lengths, and the pre-cut pipe, well, wasn't. The legs for the back piece were all the same, 10" long. Unfortunately, the front piece needed that length for the back two legs, but needed 18" legs to reach the floor (not the seat backs). Also, putting two people on the wood caused some nervous-making flex, so we added a 5th leg to each piece. The one in back was still 10", but the one for the front piece was only 8". Note that all pieces of pipe used need to be threaded on both ends!
So we entered the land of custom cutting at the hardware store. Cutting and threading short pieces of pipe is a pain in the tailquarters. Suffice it to say it got done, and no OSHA reportables ever made it to the stores records.
Ok, all the parts make it home (at this point we just needed to add a box of 3/4" wood screws). I borrowed a friends Makita, and attached the flange plates to the pieces of wood. Two of them were near the corners, and two of them were inset to fit inside the wheel wells. The center ones were offset a little toward the ones near the corners. It'll make sense when you look at it.
After that, just screw the pipes into the flanges on the wood, screw another flange to the end of each pipe, and set it in the 4Runner when needed.
I had a 4' x 6' carpet remnant lying around, which I throw on top of the whole thing to give a little more padding. Padding is key, this is plywood after all.
Finally, to meet my last design objective, I bought 4 30" pieces of 1/2" pipe. I could then screw those into the 4 corners of one of the boards, and have a nice table.
Well, I didn't quite make it out under $100, but I could have if Home Depot had all of the flange plates I needed, and I didn't go to a really expensive hardware store to get the rest. To meet this objective, you need to shop around a bit.
The end result is very easy to remove, and to store (basically two pieces of plywood; even with the flange plates on them, they don't take up much room once the legs are unscrewed.)
It was very simple to make; I just needed a screwdriver (although a drill to make pilot holes makes life much simpler), and it was certainly flexible.
It did have one shortcoming though. The table configuration really doesn't work very well. The legs are too skinny, and the flange plates don't provide enough support for a good solid table, in my opinion. See "what I'd do different" for some suggestions there.
I use the deck one of two ways. I either remove the seats altogether, and set up both parts of the deck. I put as much of my gear underneath as I can, and depending on my laziness, leave my thermarests and sleeping bags on top of the carpet all the time. Or if I'm feeling neat, I store those underneath, and just leave the carpet as a nice anonymous cover. Whatever I couldn't fit underneath when it's sleepy time just gets thrown into the front seats.
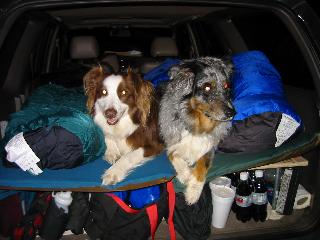
The other way I use it is to leave the back seats in. This is for when we travel with the dogs. (Two australian shepards). Feel free to insert relatives or friends in the back seat instead, but we prefer the dogs! :-) The second board just sits on top of the first one, and the carpet is rolled up and stored on top of both of them. When it's time to make camp, we remove the seat bottoms with a 12mm socket, and put one of them on the floor in front of the passenger seat. This makes it into a very nice dog couch. Throw a blanket down there to spoil the heck out of him or her, and you're good. The other gets thrown on the driver seat, or in front of it if you're willing to fuss a little bit.
First and foremost, I'd use a 3/4" piece of plywood instead of the 5/8". I don't like needing the 5th leg on each section. It cuts into the storage area flexibility pretty seriously. The thicker wood would be heavier, but I think that's an ok compromise. Alternately, run some angle iron along a long side to give it more support.
Second, if you want the table option to work, I'd use 3/4" pipe throughout to give a more stable platform. The 1/2" works great on short legs, but not on the 36" table legs.
Third, I'd consider making a more purpose built rear section. When I try and fit all my recovery gear in there as well, it gets a little awkward. The tubs I use don't fit under the deck very well, and the table legs are in the way of where I have my hi-lift. It's ok, just not ideal.
Finally, I'd get MORE PADDING. I'm getting older, and a thermarest on plywood just doesn't cut it any more. I'm looking for a futon mattress instead of the carpet piece, I think.
Overall, I am absolutely delighted with this little accessory. Yes, I'd tweak it a little bit if I were starting over, but it really is a nice way to travel if you don't want to set up tents all the time. It is plenty big enough to sleep 2 comfortably, and leaves just enough headroom to keep you from getting claustrophobic.
The next version will probably have hinged access panels so you don't have to open a door to get under it, and the rear section may be more of a nice built-in cabinet kind of thing.